Installing CCX on OpenStack
For laptop/desktop installation, see Install CCX on a Laptop.
This tutorial walks you through installing CCX on OpenStack so it is accessible from a public domain. By the end, you will have a working CCX instance reachable at ccx.example.com, with ClusterControl available at cc.example.com.
cc.example.com and ccx.example.com are placeholders. You can use any subdomain names you prefer — just replace every occurrence in the steps below.
What you will set up:
- CCX dependencies (PostgreSQL, MySQL, NATS, VictoriaMetrics, Loki, Keycloak)
- OpenStack cloud credentials and security groups
- CCX itself, exposed via Nginx Ingress with TLS
External DNS configuration is not covered here but is linked in Next Steps.
Prerequisites
Kubernetes Requirements
Ensure your cluster meets these requirements before starting. See K8S requirements for minimum cluster size and Kubernetes version.
| Requirement | Details |
|---|---|
| Subdomains | Two subdomains, e.g. ccx.example.com (end-user portal) and cc.example.com (admin portal). |
| Nginx Ingress Controller | Must have an EXTERNAL-IP assigned to its LoadBalancer service. |
| Cert Manager | Must have a working ClusterIssuer (e.g. letsencrypt-prod). |
| Persistent Volume / Storage Class | ~100Gi of storage for PVCs in this tutorial; more for production. |
| S3 Storage | For datastore backups and Operator DB backups. |
| DNS Provider | DNS A records pointing to the ingress EXTERNAL-IP, or a provider supported by external-dns. |
PVCs created during installation (~100Gi total):
NAME                                         CAPACITY   STORAGECLASS
ccxdeps-ccx-nats-js-pvc-ccxdeps-ccx-nats-0   10Gi       <your-storage-class>
cmon-master-volume                           20Gi       <your-storage-class>
cmon-var-lib-cmon                            1Gi        <your-storage-class>
datadir-ccxdeps-0                            20Gi       <your-storage-class>
pgdata-acid-ccx-0                            10Gi       <your-storage-class>
storage-alertmanager-0                       1Gi        <your-storage-class>
storage-ccxdeps-loki-0                       10Gi       <your-storage-class>
victoria-metrics                             16Gi       <your-storage-class>
OpenStack Requirements
| Requirement | Details |
|---|---|
| OpenStack RC file | Auth URL, project ID, username, password, and user domain. |
| Project for CCX datastores | A dedicated project (e.g. ccx-tenant) where database VMs are deployed. |
| Project quota | Sufficient quota for VMs, volumes, and floating IPs. |
| Ubuntu 22.04 LTS cloud image | Used for database node VMs. |
| VM root volume | Minimum 20GB per VM. |
| VM data volume | Minimum 80GB per VM. |
| VM flavors | Minimum 2 vCPU / 4GB RAM recommended. |
| Public floating IPs | Pre-allocate a reasonable number in the project network. |
| Private network | For internal VM-to-VM communication (database replication). |
Step 1 — Verify Kubernetes Infrastructure
Before installing CCX, confirm that the required Kubernetes components are healthy.
Verify Nginx Ingress
kubectl get pods --all-namespaces -l app.kubernetes.io/name=ingress-nginx
All pods must show READY and STATUS: Running:
NAMESPACE       NAME                                        READY   STATUS    RESTARTS   AGE
ingress-nginx   ingress-nginx-controller-659f54cbff-fcszg   1/1     Running   0          5h38m
ingress-nginx   ingress-nginx-controller-659f54cbff-lq29d   1/1     Running   0          5h38m
Then verify the ingress service has an EXTERNAL-IP:
kubectl get svc -n ingress-nginx
NAME                       TYPE           CLUSTER-IP     EXTERNAL-IP       PORT(S)
ingress-nginx-controller   LoadBalancer   10.108.22.0    146.190.177.145   80:31096/TCP,443:31148/TCP
The EXTERNAL-IP must be set. If it shows <pending>, the installation will fail.
Verify Cert Manager
kubectl get pods -n cert-manager
All three pods must be Running:
NAME                                       READY   STATUS    RESTARTS   AGE
cert-manager-66dbc9658d-4hh55              1/1     Running   0          11d
cert-manager-cainjector-69cfd4dbc9-lmxf2   1/1     Running   0          11d
cert-manager-webhook-5f454c484c-bx8gx      1/1     Running   0          11d
Check that a ClusterIssuer exists:
kubectl get clusterissuer
NAME               READY   AGE
letsencrypt-prod   True    2y233d
If no ClusterIssuer exists, create one. Save the following as clusterissuer.yaml, replacing the two commented fields:
apiVersion: cert-manager.io/v1
kind: ClusterIssuer
metadata:
  name: letsencrypt-prod
spec:
  acme:
    email: some@email.com        # CHANGE THIS
    server: https://acme-v02.api.letsencrypt.org/directory
    privateKeySecretRef:
      name: some-key             # CHANGE THIS
    solvers:
    - http01:
        ingress:
          class: nginx
kubectl apply -f clusterissuer.yaml
Verify the issuer registered successfully:
kubectl describe clusterissuer letsencrypt-prod
Look for this in the output:
Message: The ACME account was registered with the ACME server
If you are using a custom certificate instead of Let's Encrypt, upload it manually to the ccx namespace. Validate it with:
kubectl get cert -n ccx
The READY column must show True.
Configure DNS
Create two DNS A records pointing to your ingress EXTERNAL-IP:
A  146.190.177.145  ccx.example.com
A  146.190.177.145  cc.example.com
ccx.example.com— end-user portalcc.example.com— ClusterControl admin portal (not recommended to expose publicly)
Step 2 — Add the Helm Repository and Create a Namespace
helm repo add s9s https://severalnines.github.io/helm-charts/
helm repo update
The full chart source is on GitHub.
Create and activate the ccx namespace:
kubectl create namespace ccx
kubectl config set-context --current --namespace=ccx
Step 3 — Install CCX Dependencies
Install the ccxdeps chart, which includes:
- PostgreSQL (operator docs)
- MySQL (operator docs)
- NATS
- VictoriaMetrics
- Loki
- Keycloak
helm install ccxdeps s9s/ccxdeps --debug --wait -n ccx
Verify all pods are Running:
kubectl get pods -n ccx
NAME                                         READY   STATUS    RESTARTS   AGE
acid-ccx-0                                   1/1     Running   0          7m13s
alertmanager-0                               1/1     Running   0          7m22s
ccxdeps-0                                    1/2     Running   0          67s
ccxdeps-ccx-nats-0                           3/3     Running   0          7m22s
ccxdeps-ccx-nats-box-c777b9b98-thhfs         1/1     Running   0          7m22s
ccxdeps-keycloak-0                           1/1     Running   0          7m22s
ccxdeps-loki-0                               1/1     Running   0          7m22s
ccxdeps-loki-gateway-56c8f56c6b-kw9s8        1/1     Running   0          7m22s
ccxdeps-postgres-operator-6847687666-79x8l   1/1     Running   0          7m22s
mysql-operator-5876cf5b66-6knkp              1/1     Running   0          27s
victoria-metrics-845694c98d-24wng            1/1     Running   0          7m22s
victoria-metrics-alert-7f695bf5c8-96ch5      1/1     Running   0          7m22s
MySQL operator failing to start? If kubectl logs mysql-operator-<pod-id> shows:
persists try setting MYSQL_OPERATOR_K8S_CLUSTER_DOMAIN via environment
Edit the deployment and add the environment variable:
kubectl edit deployment -n ccx mysql-operator
In the env section, add:
env:
  - name: MYSQL_OPERATOR_K8S_CLUSTER_DOMAIN
    value: "cluster.local"
Then restart:
kubectl rollout restart deployment -n ccx mysql-operator
Step 4 — Configure OpenStack Credentials
About the Cloud Identifier
Throughout this step you will see the placeholder MYCLOUD. This is the internal identifier for your OpenStack cloud and must be consistent across your secrets and the values file in Step 5.
For example, if you want to name your cloud grok:
- Replace
MYCLOUDwithgrokin the secrets files - Use
grokas thecode:value inminimal-openstack.yaml
Option A — Template File (recommended for first-time setup)
Download the secrets template. The template uses stringData (plain text):
---
apiVersion: v1
kind: Secret
metadata:
  name: openstack
type: Opaque
stringData:
  MYCLOUD_AUTH_URL: YOUR
  MYCLOUD_PASSWORD: OPENSTACK
  MYCLOUD_PROJECT_ID: CREDENTIALS
  MYCLOUD_USER_DOMAIN: HERE
  MYCLOUD_USERNAME: AND_HERE
---
apiVersion: v1
kind: Secret
metadata:
  name: openstack-s3
type: Opaque
stringData:
  MYCLOUD_S3_ENDPOINT: CHANGE_ME    # Without protocol prefix, e.g. s3.example.com
  MYCLOUD_S3_ACCESSKEY: CHANGE_ME
  MYCLOUD_S3_SECRETKEY: CHANGE_ME
  MYCLOUD_S3_INSECURE_SSL: "false"  # true = http, false = https
Fill in your OpenStack RC file values and S3 credentials, save as openstack-secrets.yaml, then apply:
kubectl apply -n ccx -f openstack-secrets.yaml
Option B — Script with Base64 Encoding (recommended for production)
Download and run the helper scripts:
curl -o create-openstack-secrets.sh https://raw.githubusercontent.com/severalnines/helm-charts/main/charts/ccx/scripts/openstack/create-openstack-secrets.sh
curl -o create-openstack-s3-secrets.sh https://raw.githubusercontent.com/severalnines/helm-charts/main/charts/ccx/scripts/openstack/create-openstack-s3-secrets.sh
chmod u+x create-openstack-secrets.sh create-openstack-s3-secrets.sh
./create-openstack-secrets.sh
./create-openstack-s3-secrets.sh
Apply the generated files:
kubectl apply -n ccx -f openstack-secrets.yaml
kubectl apply -n ccx -f openstack-s3-secrets.yaml
Verify Secrets
kubectl get secrets -n ccx
Confirm both openstack and openstack-s3 secrets appear in the list.
Step 5 — Prepare the OpenStack Configuration
Gather Required OpenStack Values
You will need the following IDs and codes from your OpenStack project:
| Field | Description |
|---|---|
floating_network_id | ID of the public network used for floating IPs. |
network_id | ID of the private/internal network used for VM-to-VM communication. |
project_id | OpenStack project ID where datastores will be deployed. |
image_id | ID of the Ubuntu 22.04 LTS cloud image. |
instance_type | Flavor code, e.g. x4.2c4m.100g (2 vCPU, 4GB RAM minimum). |
volume_type | Volume type name, e.g. fastdisk. Must match exactly in OpenStack. |
region | Region name, e.g. nova or sto1. |
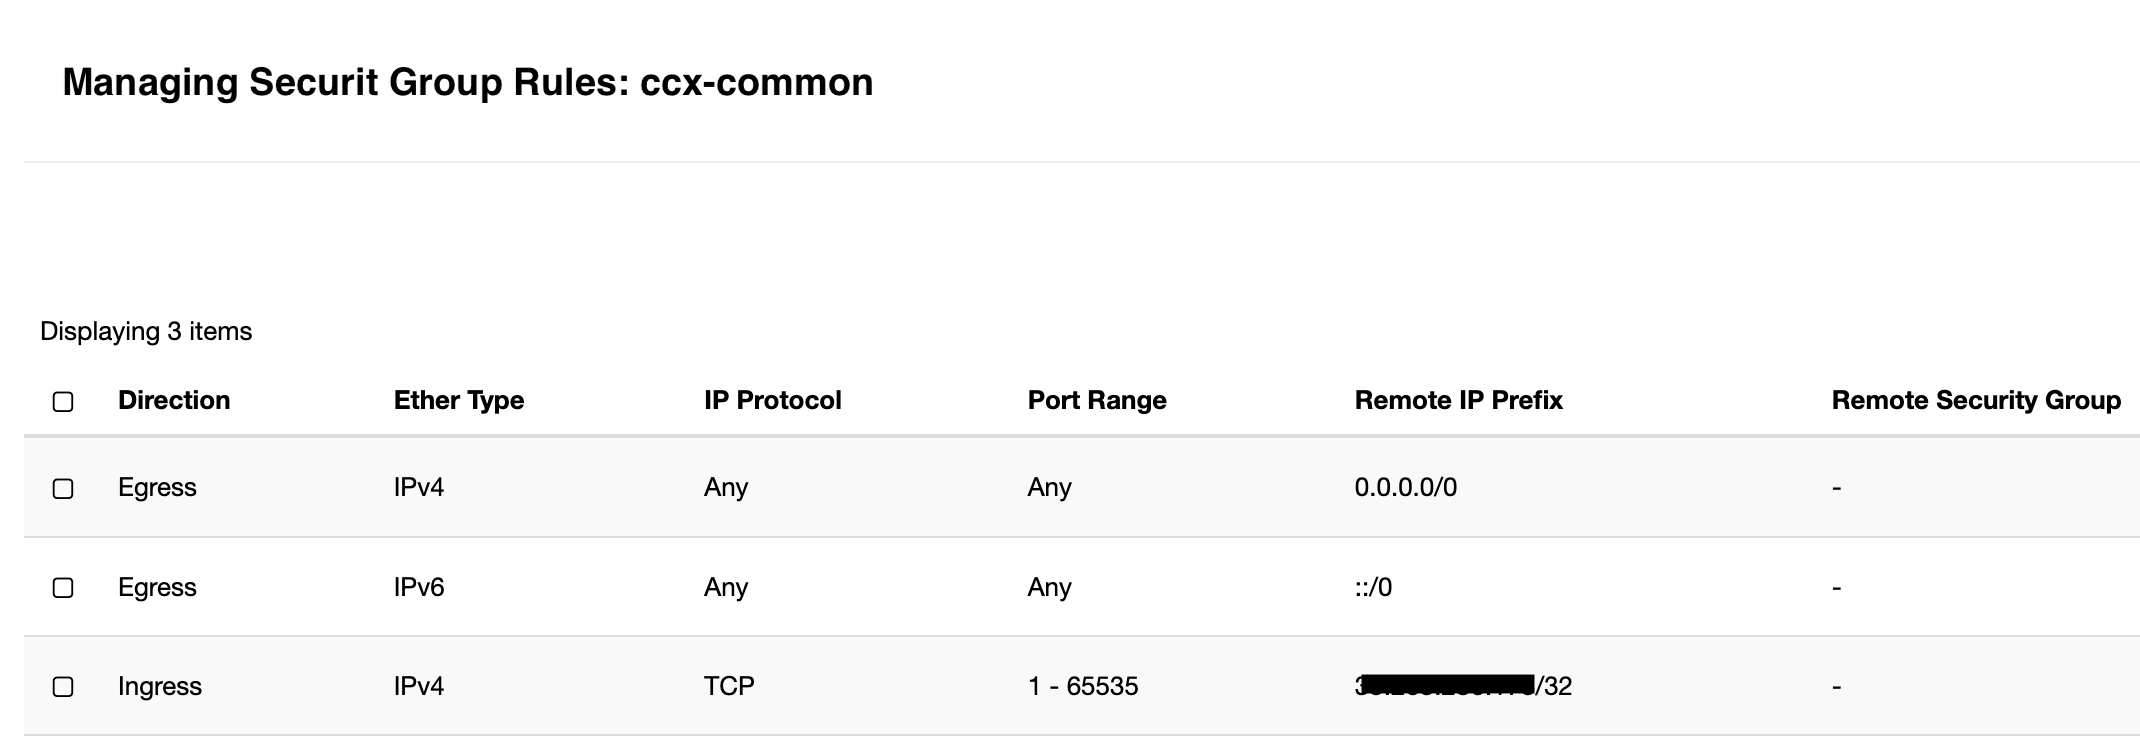
Create the ccx-common Security Group
Create a security group named ccx-common in your OpenStack project. It must allow all TCP traffic (ports 1–65535) from each Kubernetes worker node IP, both ingress and egress.
If you have three worker nodes with different IP addresses, add a separate rule for each IP allowing ports 1–65535.
For a full list of ports and external endpoints that must be reachable — including database vendor package repositories, backup storage, and notification services — see the Firewall and Air-Gapped Deployment guide.
Network Setup
CCX requires two networks:
Public network — used to assign floating IPs to database VMs so the CCX control plane can reach them.
The floating_network_id in your values file identifies this network. If your OpenStack project uses a public IP pool, also set public_pool to the same value. If not (the most common case), leave public_pool empty — CCX will create and attach floating IPs automatically.
| Overview | Subnets | Topology |
|---|---|---|
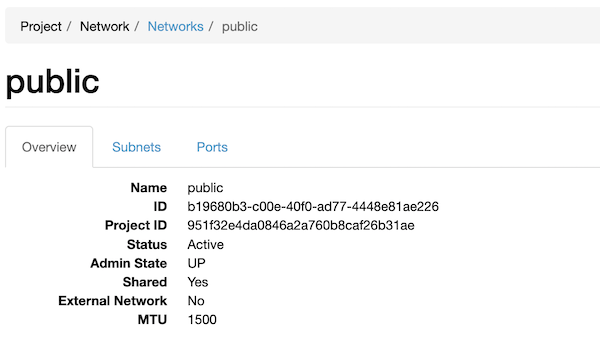 | 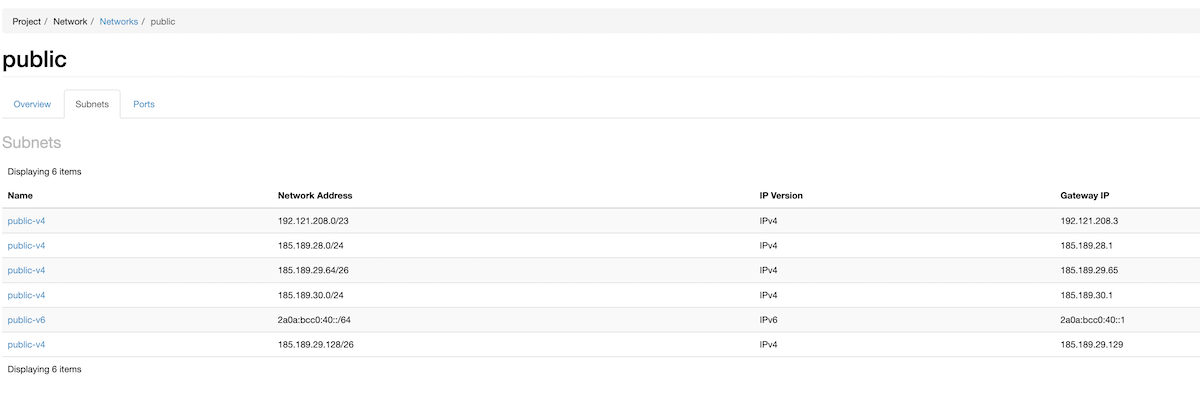 | 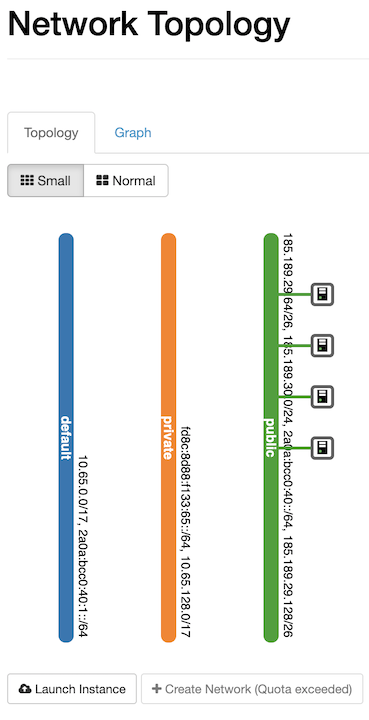 |
Private network — used for internal VM communication (database replication). Identified by network_id.
| Overview | Subnets | Ports |
|---|---|---|
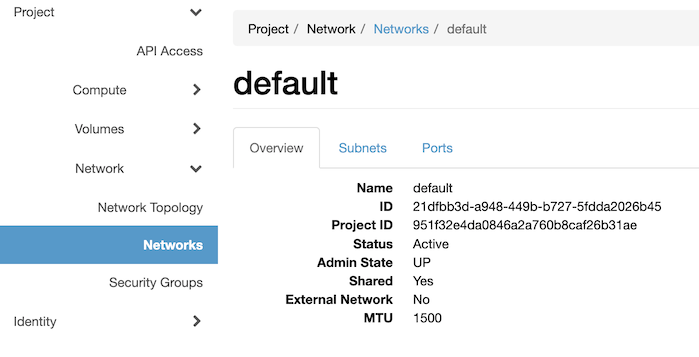 | 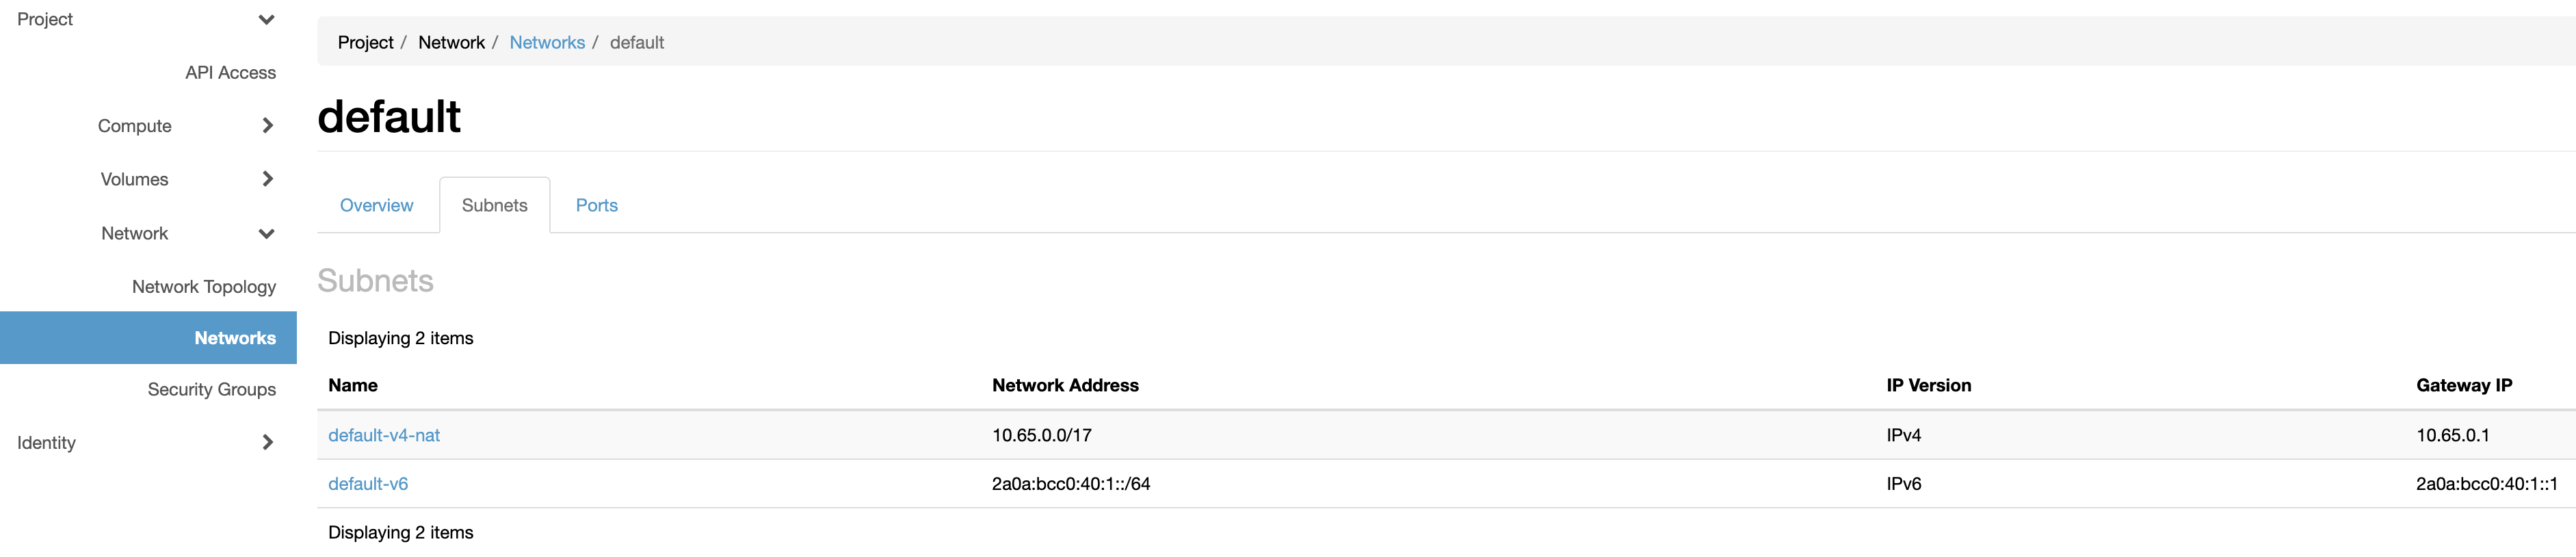 | 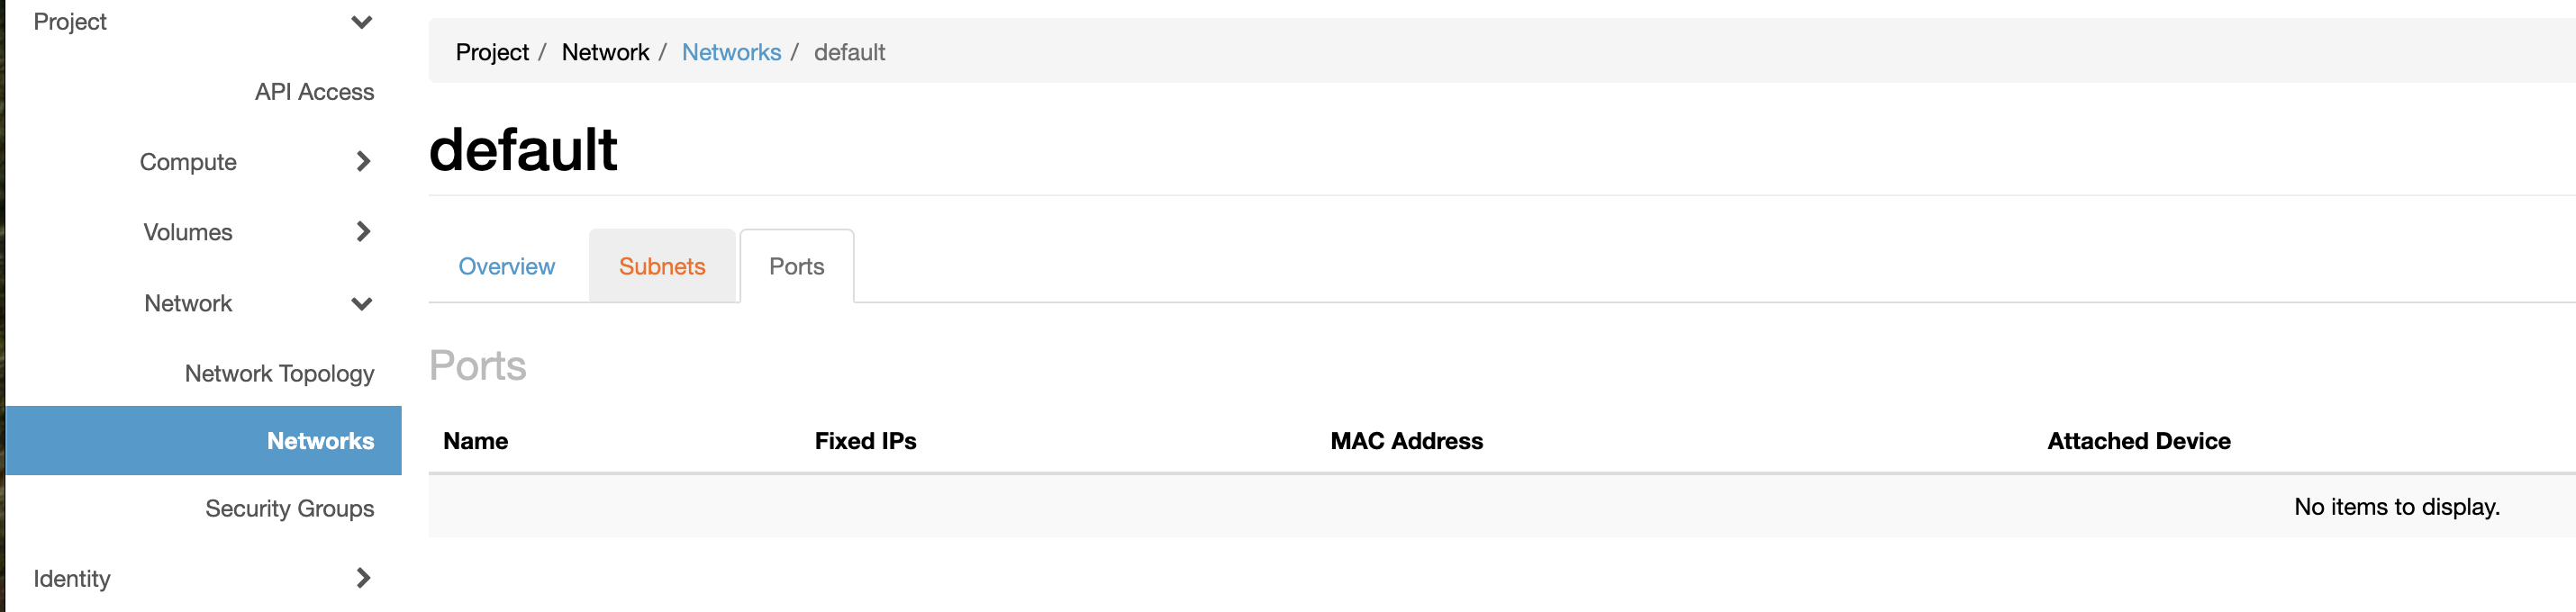 |
Download and Edit the Values File
curl -o minimal-openstack.yaml https://raw.githubusercontent.com/severalnines/helm-charts/main/charts/ccx/minimal-values-openstack.yaml
Edit minimal-openstack.yaml and replace all MY_* placeholders with your actual values. Verify instance types, volume types, and network IDs before proceeding.
The following identifiers are case-sensitive: cloud code, region code, availability zone code, and the codes for instance_types, volume_types, and network_types. Be consistent throughout the file.
Sample Values File
Below is a minimal working example. You can add more instance types, regions, and clouds later.
ccxFQDN: ccx.example.com
ccFQDN: cc.example.com
cc:
  cidr: 0.0.0.0/0
cmon:
  licence:  # Insert your licence key here
ccx:
  cidr: 0.0.0.0/0
  cloudSecrets:
    - openstack      # Must match the Kubernetes secret name from Step 4
    - openstack-s3
  env:
    DISABLE_ROLLBACK: "false"  # Set to "false" in production; "true" preserves failed deploys for debugging
  ingress:
    ssl:
      clusterIssuer: letsencrypt-prod
  config:
    clouds:
      - code: mycloud       # Must match MYCLOUD prefix in your secrets
        name: MyCloud
        instance_types:
          - code: x4.2c4m.100g
            cpu: 2
            disk_size: 100
            name: x4.2c4m.100g
            ram: 4
            type: x4.2c4m.100g
        volume_types:
          - code: fastdisk   # Must match the OpenStack volume type name exactly
            has_iops: false
            info: Optimized for performance
            name: Fast storage
            size:
              default: 60    # 100GB recommended for production
              max: 1000
              min: 30
        network_types:
          - code: public
            name: Public
            in_vpc: false
            info: >
              All instances will be deployed with public IPs.
              Access to the public IPs is controlled by a firewall.
        regions:
          - code: sto1             # Case-sensitive region code
            display_code: my-region1
            name: Stockholm
            city: Stockholm
            country_code: SE
            continent_code: EU
            availability_zones:
              - code: nova         # Case-sensitive AZ code
                name: az1
  services:
    deployer:
      config:
        openstack_vendors:
          mycloud:
            compute_api_microversion: "2.79"
            floating_network_id: b19680b3-c00e-40f0-ad77-4448e81ae226  # Replace with your value
            # public_pool: b19680b3-c00e-40f0-ad77-4448e81ae226         # Uncomment if using a public pool
            network_api_version: NetworkNeutron
            network_id: 21dfbb3d-a948-449b-b727-5fdda2026b45            # Replace with your value
            project_id: 5b8e951e41f34b5394bb7cf7992a95de                # Replace with your value
            regions:
              sto1:
                image_id: 936c8ba7-343a-4172-8eab-86dda97f12c5          # Replace with your Ubuntu 22.04 image ID
                secgrp_name: ccx-common
Step 6 — Install CCX
helm upgrade --install ccx s9s/ccx --debug --wait -f minimal-openstack.yaml
Wait for the command to complete, then verify all pods are running:
kubectl get pods -n ccx
Step 7 — Access the CCX Web UI
Open https://ccx.example.com/auth/register?from=ccx in a browser and register a new user.
Email notifications are not configured yet. After signing up, you can press Back to continue without email verification.
Try deploying a test datastore. If it fails at approximately 8% or 16%, there is an infrastructure issue — see Troubleshooting below.
Troubleshooting
Deployment Fails
Datastore deployment typically fails due to:
- Firewall —
ccx-commonsecurity group is missing the IP of one or more K8s worker nodes. See Firewall and Air-Gapped Deployment for the full list of required ports. - Quota — insufficient OpenStack project quota for VMs, volumes, or floating IPs.
- Cloud-init — the bootstrap script on the VM failed.
- Networking — CCX cannot reach the deployed VM.
Steps to diagnose:
-
Check runner service logs:
kubectl logs ccx-runner-service-NNNN -
SSH into the deployed VM and inspect cloud-init logs:
kubectl run -it --rm ssh-db-node \
  --image=europe-docker.pkg.dev/severalnines-public/ccx/ssh-db-node:latest \
  --restart=Never -- <store_uuid>
Then check
/var/log/cloud-init.logand/var/log/cloud-init-output.log.Obtain
<store_uuid>from the CCX UI on the datastore detail page.
Timeouts
If you see timeout errors, verify that ccx-common includes entries for all K8s worker node IPs (not just the ingress EXTERNAL-IP).
TLS Certificate Not Ready
1. Check certificate status:
kubectl get cert -n ccx
If READY is False, describe the certificate:
kubectl describe certificate -n ccx ccx-ingress
2. Check for pending ACME challenges:
kubectl get challenges -n ccx
The status field shows the error preventing certificate issuance.
3. If no challenge exists, inspect the ACME order:
kubectl get order.acme.cert-manager.io
kubectl describe order.acme.cert-manager.io <order-name> | grep Reason
4. If you see a proxy protocol error:
Error example:
Error presenting challenge: admission webhook "validate.nginx.ingress.kubernetes.io" denied the request:
ingress contains invalid paths: path /.well-known/acme-challenge/... cannot be used with pathType Exact
Check the nginx-ingress ConfigMap and ensure use-proxy-protocol is set to false:
kubectl get configmap -n ingress-nginx
OpenStack's default load balancer does not support the proxy protocol unless you use a custom load balancer such as HAProxy.
5. If use-proxy-protocol must remain enabled, exclude the ccx namespace from the admission webhook:
kubectl get validatingwebhookconfiguration
# identify the ingress-nginx-xxxxx-admission entry
kubectl edit validatingwebhookconfiguration ingress-nginx-xxxxx-admission
Add to namespaceSelector:
namespaceSelector:
  matchExpressions:
  - key: nginx-webhook
    operator: NotIn
    values:
    - disabled
Then:
- Restart all nginx ingress pods.
- Add the label
kubernetes.io/metadata.name=ccxto theccxnamespace. - Wait ~5 minutes for changes to propagate.
- Delete the
ccx-ingresscertificate object — it will be recreated automatically and should reachReady: Truewithin a few minutes.
For additional troubleshooting, see the Troubleshooting guide.
Next Steps
- Configure ExternalDNS — gives end-users stable database endpoints. Delete all datastores before setting this up.
- Firewall and Air-Gapped Deployment — full reference of every external endpoint and port CCX needs at runtime.
- Run End-to-End Tests
- White-label the UI
- Configure JWT authentication
- Add more instance types, volume types, and regions to your values file
- Billing API
- Upgrade to production-ready